
Overview
dangle from a central ring (like tentacles) or hang from horizontal
strips (like curtains). The Tentacle System consists of 2 boards: the
Tentacle Buddy and the Tentacle Breakout. It's optimized for a
Pixelblaze Pico though they can be used with any LED controller, and for
Pebble-style strands with a Data Return line. They help keep your LED
data wiring tidy and compact, make connectorizing strands and
controllers easy, and also feature a convenient USB-C connector for
powering both the LEDs and controller.
Click the dropdowns below for more information on how to hook them up!
Controller Option 1 - Direct Soldering to a Pixelblaze Pico
First, cover the back of the Pico with tape (we like kapton best for this) to insulate the exposed pads on the back of the Pico.
Next, solder the Pico and the Buddy together using the castellated edges.


Controller Option 2 - Connectorizing for a Pico or any LED Controller

Adding the LEDs
LEDs Option 1 - Direct Soldering a Pebble Strand
Next, cut your Pebble strand to the length you want, leaving enough wire coming out of the last LED for you to strip and splice it. Strip the Data Out and Data Return wires, and solder them together. You may want to cover the splice with clear heat shrink so it doesn't accidentally short to anything else.


LEDs Option 2 - Connectorizing
First, solder the included JST connector to the Buddy.
Next, solder the included JST pigtail cable to your LEDs. You can cut the cable and strip the wires if you need a shorter length. The cable will solder to Pebble strands 1:1, meaning no wires will be crossed if your Pebble strand is lens-side-up and the connector is oriented so it plugs straight into the Buddy. Also note that the 5V wire is marked on all Pebble strands we sell.
Repeat for the side connector to attach more LEDs.
Don't forget to terminate each tentacle so that your Data Return wire brings the data back up to the Buddy (see Option 1).


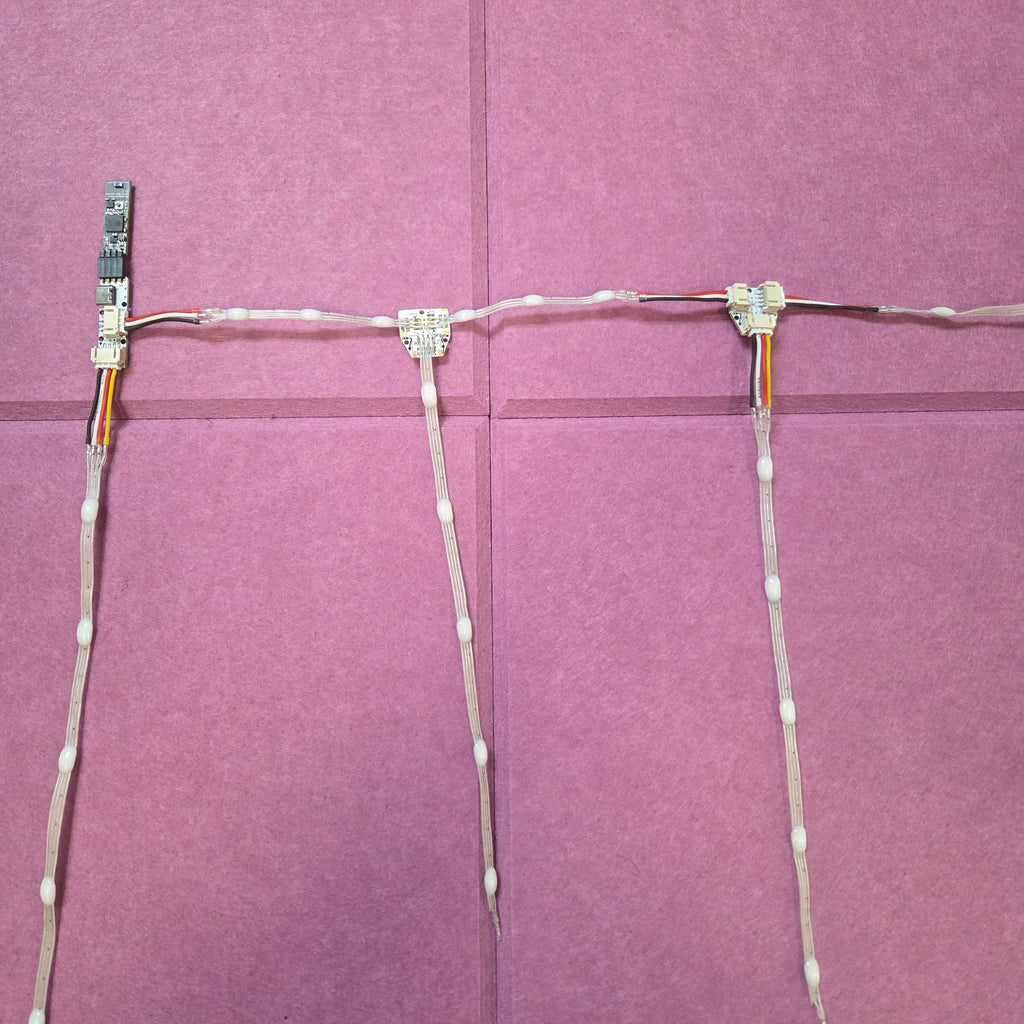
Option 1 - Direct Soldering to Pebble strands with Bare PCBs
This is an option for the unpopulated flex or rigid PCBs. The data enters the Tentacle Breakout on the left side, is routed down to the Tentacle pads on the bottom, and then goes out the pads on the right side.


Attach your incoming LED data. If it's coming from another Pebble strand, strip and solder the wires on the Data Out side of the strand to the pads on the left side of the Tentacle Breakout board. If using the flex PCB version, be efficient and quick when soldering as these are not quite as heat-resistant as rigid boards. Use flux! The soldering should be 1:1 Pebble to pads as long as the Pebble lenses are facing up. The marked wire on the Pebble strand is 5V. The markings on the PCBs correspond to:
+ = 5V
D = Data
- = GND
DR = Data Return
Attach your Tentacle. Find the Data In side of your Pebble strand with Data Return, and strip the wires back. Solder them directly to the pads coming out of the bottom of the Buddy, with the Pebble lens facing up. You can tell which side is "up" because it will have a more pronounced bump than the "back" side.
Terminate your Tentacle. Cut your Tentacle to the length you want, leaving enough wire coming out of the last LED for you to strip and splice it. Strip the Data Out and Data Return wires, and solder them together. You may want to cover the splice with clear heat shrink so it doesn't accidentally short to anything else.
Attach your outgoing LEDs (or wires). The LED data from the last LED on the Tentacle is routed to the pads on the right side of the PCB. You can attach wires, a standard 3-pin LED strand, or another Data Return style strand leaving the Data Return line unconnected. Make sure you strip and solder the Data In side of that strand.


Alternate: Skip the Tentacle. There's also a small solder jumper in the center of the board. Bridging these pads with solder will skip the downward tentacle, and route the data coming in on the left to the data going out on the right. It can be a little easier than trying to splice Pebble wires together, especially for strands with small 15 or 20 mm pitches. With the flex circuits, you can also just cut off the downward Tentacle pads completely.


Option 2 - Connectorizing to Pebble strands with Populated Rigid PCB

Don't forget to follow the instructions above to terminate your Tentacle strands so that the Data Return line carries the LED data back up to the PCB.


Plug in a USB power source
